カテゴリー別アーカイブ: Unity

パーティクルをインスタンス描画する

環境:Unity 2020.3.11f1

Unityでパーティクルに取り組んでみました。Compute ShaderとGPU InstancingをつかってGPUでアニメーションと描画をさせています。

インスタンス描画をすることで大量の同一マテリアルの同一オブジェクトを一括で描画するので描画パフォーマンスが上がります。

背景メッシュと合わせて、ドローコールは2。とにかく高速。

用意したのは板ポリゴンのみ。

使うファイルは3つ
・パーティクルを管理するクラス(.csファイル)
・コンピュートシェーダ(.computeファイル)
・通常の描画シェーダ(.shaderファイル)

管理クラスからコンピュートシェーダに渡した結果を受け取って通常シェーダへ流すといった処理になります。

クラス内の宣言部分

    private const int ThreadBlockSize = 8;

    // 渡す先のコンピュートシェーダ
    [SerializeField] private ComputeShader computeShader;

    // コンピュートシェーダに渡すメッシュ
    [SerializeField] private MeshFilter particleMeshFilter;

    // DrawMeshInstancedIndirect()で使うマテリアル
    [SerializeField] private Material instanceMaterial;

    // インスタンス数
    private int instanceCount;

    // コンピュートシェーダに使うバッファ
    private ComputeBuffer instanceObjBuffer;

    // インスタンス描画に使うバッファ
    private ComputeBuffer argsBuffer;

    // argBuffer用の配列
    private uint[] args = new uint[5] { 0, 0, 0, 0, 0, };
    

    // シェーダに渡すパーティクル構造体
    public struct Particle
    {
        public Vector3 pos;
        public Vector4 color;
        public float scale;
        public Vector3 prev;
        public Vector3 next;
    };

    public Particle[] particle;

パーティクル構造体は好きな構造にしてよい。ここでは

pos: 現在座標
color: 色
scale: スケール
prev: スタート座標
next: ゴール座標

という構成にしている。スタート座標とゴール座標の中間位置を計算して現在座標に戻すという計算をコンピュートシェーダにさせる。

初期化

        // Compute Shaderのメモリを確保
        instanceObjBuffer = new ComputeBuffer(instanceCount, Marshal.SizeOf(typeof(Particle)));

        // パーティクルの情報をセット
        instanceObjBuffer.SetData(particle);

        // Compute Shaderにバッファを設定
        int mainKernel = computeShader.FindKernel("CSMain");
        computeShader.SetBuffer(mainKernel, "Result", instanceObjBuffer);

        // マテリアルにバッファを伝える
        instanceMaterial.SetBuffer("_ParticleBuffer", instanceObjBuffer);

        // DrawMeshInstancedIndirect()に渡すバッファの設定
        argsBuffer = new ComputeBuffer(1, sizeof(uint) * args.Length, ComputeBufferType.IndirectArguments);

        // 第一引数はメッシュの頂点数、第二引数はインスタンス数
        int subMeshIndex = 0;   // 基本は0
        args[0] = particleMeshFilter.mesh.GetIndexCount(subMeshIndex);  // メッシュの頂点数
        args[1] = (uint)instanceCount;
        //_args[2] = particleMeshFilter.mesh.GetIndexStart(subMeshIndex);
        //_args[3] = particleMeshFilter.mesh.GetBaseVertex(subMeshIndex);

        argsBuffer.SetData(args);

バッファーの情報をコンピュートシェーダとマテリアルに伝えている部分です。

    void OnDestroy()
    {
        instanceObjBuffer.Release();
        argsBuffer.Release();
    }

パーティクルの情報をクリアして再構成したい場合は、一度メモリを開放して再度初期化します。

更新処理

    void Update()
    {
        // Compute Shaderの変数にセット
        computeShader.SetFloat("time", newTime);

        // Compute Shaderのカーネルを実行する
        int mainKernel = computeShader.FindKernel("CSMain");
        int threadGroupX = (instanceCount / ThreadBlockSize) + 1;
        computeShader.Dispatch(mainKernel, threadGroupX, 1, 1);

        // コンピュートシェーダの結果を受けて値を更新する
        var data = new Particle[instanceCount];
        instanceObjBuffer.GetData(data);

        for(int i = 0; i < instanceCount; i++)
        {
            particle[i] = data[i];
        }

        // DrawMeshInstancedIndirectでインスタンス描画
        Graphics.DrawMeshInstancedIndirect(particleMeshFilter.mesh, 0, instanceMaterial, new Bounds(Vector3.zero, Vector3.one * 100f), argsBuffer);
    }

コンピュートシェーダに値を渡して実行し(ここではnewTimeという値に0~1までにスケールした時間の値を渡している)、座標計算の結果を受け取ります。そして最後にインスタンス描画を実行しています。

DrawMeshInstancedIndirect() の引数について

mesh: 描画するメッシュ
submeshIndex: サブメッシュのインデックス。基本的に0でよい。
bounds: 描画する範囲。中心座標、大きさの順。
bufferWithArgs: 描画する個数等の入ったデータ

座標計算用のコンピュートシェーダ

GPUにパーティクルの動きを計算させるコードです。パーティクル構造体のバッファと時間の変数を渡して計算させています。

// Each #kernel tells which function to compile; you can have many kernels

#pragma kernel CSMain

#define ThreadBlockSize 8

float time;

struct Particle{
    float3 pos;
    float4 color;
    float scale;
    float3 prev;
    float3 next;
};

RWStructuredBuffer<Particle> Result;

[numthreads(ThreadBlockSize,1,1)]
void CSMain (uint id : SV_DispatchThreadID)
{
    Particle p = Result[id];

    p.pos = p.prev + (p.next - p.prev) * time;

    Result[id] = p;
}

prevにスタート座標、nextにゴール座標を設定し、0から1の間で中間の座標を線形補完して導いています。

描画用シェーダ

パーティクルを描画させるシェーダです。ここも同じパーティクルの構造体 のバッファ を渡しています。

Shader "Unlit/ParticleBillboard"
{
    SubShader
    {
        Tags { "RenderType"="Opaque" }
        LOD 100

        Pass
        {
            CGPROGRAM
            #pragma vertex vert
            #pragma fragment frag

            #include "UnityCG.cginc"

            // パーティクルの構造体
            struct Particle
            {
                float3 position;
                float4 color;
                float scale;
                float3 prev;
                float3 next;
            };

            struct appdata
            {
                float4 vertex : POSITION;
            };

            struct v2f
            {
                float4 vertex : SV_POSITION;
                float4 color : COLOR;
            };

            StructuredBuffer<Particle> _ParticleBuffer;

            v2f vert (appdata v, uint instanceId : SV_InstanceID)
            {
                Particle p = _ParticleBuffer[instanceId];

                v2f o;

                // 色を出力
                o.color = p.color;

                // 移動だけ抜いたビュー行列(ビルボード行列)
                float4x4 billboardMatrix = UNITY_MATRIX_V;
                billboardMatrix._m03 =
                billboardMatrix._m13 =
                billboardMatrix._m23 =
                billboardMatrix._m33 = 0;

                // 移動抜きビュー行列を頂点に掛けて、オフセット座標を足す
                v.vertex = float4(p.position,1) + mul(v.vertex * p.scale, billboardMatrix);

                // ビュー・プロジェクション行列を掛ける
                o.vertex = mul(UNITY_MATRIX_VP, v.vertex);

                return o;
            }

            fixed4 frag (v2f i) : SV_Target
            {
                return i.color;
            }

            ENDCG
        }
    }
}

頂点シェーダの部分でビルボード用のビュー行列をつくって、カメラの方を向くようにしています。パーティクル構造体から受け取った個々の色をカラーとして出力しています。

※Unityの行列は列オーダーの並びになっているので注意

m00, m01, m02, m03
m10, m11, m12, m13
m20, m21, m22, m23
m30, m31, m32, m33

Xx, Yx, Zx, 0
Xy, Yy, Zy, 0
Xz, Yz, Zz, 0
0, 0, 0, 1

古いスマートフォン端末でも軽々動きます。

Unity: ジャンプ

環境:Unity 2019.2.13f1

せっかくなのでキャラクターをジャンプさせてみました。


まずはアニメーションの遷移から。アニメーションはジャンプする瞬間、ジャンプ中、着地の3つを用意する。Animatorはこのような構造にする。bool型でIsJumpingとIsLandingのフラグをつくる。

BlendTree(歩きモーション)からJumpまでの遷移のConditionをIsJumping、trueに設定。Has Exit Timeは外す。

JumpingからLandingの遷移のConditionのIsLandingをtrueに設定。Has Exit Timeは外す。


PlayerのGameObjectにRigidBodyとCapsule Colliderを追加する。RigidbodyのFreeze RotationのXとZにチェックを入れて倒れないようにする。


プレイヤー動作のコードは以下

using System.Collections;
using System.Collections.Generic;
using UnityEngine;

public class PlayerControllerJump : MonoBehaviour
{
    GameObject camera;	// 外部のオブジェクトを参照する

    float moveSpeed = 2.0f;
    float rotationSpeed = 360.0f;

    Animator animator;

    Rigidbody rigidbody;

    bool isJump;

    public float jumpPower = 5.0f;

    // Start is called before the first frame update
    void Start()
    {
        camera = GameObject.FindGameObjectWithTag("MainCamera");
        animator = this.GetComponentInChildren();
        rigidbody = this.GetComponent();

        // 全体の重力を変更する
        Physics.gravity = new Vector3(0, -5.0f, 0);
    }

    // Update is called once per frame
    void Update()
    {
        // ゲームパッドの左スティックのベクトルを取得する
        Vector3 direction = new Vector3(Input.GetAxis("Horizontal"), 0, Input.GetAxis("Vertical"));

        // 他のオブジェクトのスクリプトを読み込む(スクリプトはクラス扱い)
        CameraController cameraScript = camera.GetComponent();

        // カメラのY軸角度から回転行列を生成する
        Quaternion rot = Quaternion.Euler(0, cameraScript.cameraRotation.y * Mathf.Rad2Deg + 90, 0);

        // 逆行列を生成する
        Matrix4x4 m = Matrix4x4.TRS(Vector3.zero, rot, Vector3.one);
        Matrix4x4 inv = m.inverse;

        // 回転行列をかけたベクトルに変換する
        direction = inv.MultiplyVector(direction);

        if (direction.magnitude > 0.001f)
        {
            // Slerpは球面線形補間、Vector3.Angleは二点間の角度(degree)を返す
            Vector3 forward = Vector3.Slerp(this.transform.forward, direction, rotationSpeed * Time.deltaTime / Vector3.Angle(this.transform.forward, direction));

            // ベクトル方向へ向かせる
            transform.LookAt(this.transform.position + forward);
        }

        // 座標移動させる
        transform.position += direction * moveSpeed * Time.deltaTime;

        // アニメーターコントローラへ値を渡す
        animator.SetFloat("Blend", direction.magnitude);

        if (Input.GetButtonDown("Jump") && isJump == false)
        {
            isJump = true;
            animator.SetBool("IsJumping", true);
            animator.SetBool("IsLanding", false);
            rigidbody.velocity += Vector3.up * jumpPower;
        }
    }

    void OnCollisionEnter(Collision other)
    {
        isJump = false;
        animator.SetBool("IsJumping", false);
        animator.SetBool("IsLanding", true);
    }
}


Unity: 目標に向かって走るキャラクター

環境:Unity 2019.2.13f1

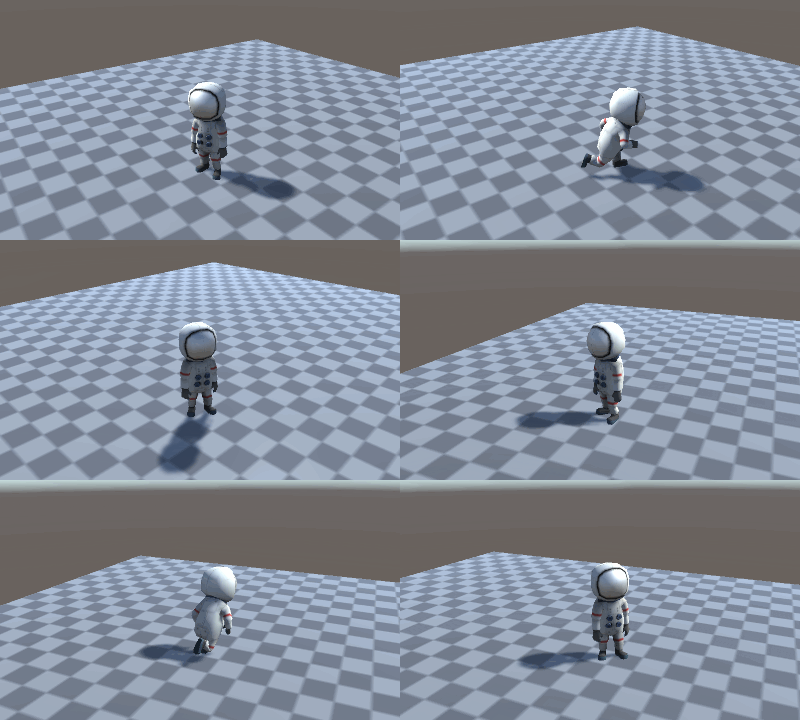
カメラは平行移動と中心座標を回転する。キャラクターは一定の距離が開くと中心座標に向かって走る。


カメラのコード

クラス名はCameraController2で、前回のコードを差し替える形で作成。

using System.Collections;
using System.Collections.Generic;
using UnityEngine;

public class CameraController2 : MonoBehaviour
{
    public Vector3 cameraRotation = new Vector3();
    Vector3 currentCamRotation = Vector3.zero;

    public float armLength = 4.0f;
    public float speed = 2.0f;

    public Vector3 target = new Vector3();
    Vector3 currentLookAtPos = new Vector3();

    // Start is called before the first frame update
    void Start()
    {
        
    }

    // Update is called once per frame
    void Update()
    {
        // ゲームパッド右スティックからの値を加算する
        cameraRotation += new Vector3(-Input.GetAxis("Vertical2"), -Input.GetAxis("Horizontal2"), 0) * 0.05f;

        // X軸回転の制限
        cameraRotation.x = Mathf.Clamp(cameraRotation.x, 30 * Mathf.Deg2Rad, 75 * Mathf.Deg2Rad);

        // 遅延用の角度との差分をとる
        Vector3 diff = cameraRotation - currentCamRotation;
        currentCamRotation += WrapAngle(diff) * 0.2f;

        // 角度からベクトルを計算する
        Vector3 craneVec = new Vector3
        (
            Mathf.Cos(currentCamRotation.x) * Mathf.Cos(currentCamRotation.y),
            Mathf.Sin(currentCamRotation.x),
            Mathf.Cos(currentCamRotation.x) * Mathf.Sin(currentCamRotation.y)
        );

        // ゲームパッドの左スティックのベクトルを取得する
        Vector3 direction = new Vector3(Input.GetAxis("Horizontal"), 0, Input.GetAxis("Vertical"));

        // カメラのY軸角度から回転行列を生成する
        Quaternion rot = Quaternion.Euler(0, (cameraRotation.y * Mathf.Rad2Deg + 90), 0);

        // 逆行列を生成する
        Matrix4x4 m = Matrix4x4.TRS(Vector3.zero, rot, Vector3.one);
        Matrix4x4 inv = m.inverse;

        // 回転行列をかけたベクトルに変換する
        direction = inv.MultiplyVector(direction);

        target += direction * direction.magnitude * Time.deltaTime * speed;

        // 注視点の座標
        Vector3 lookAtPos = target + new Vector3(0, 0, 0);
        currentLookAtPos += (lookAtPos - currentLookAtPos) * 0.2f;

        // カメラの座標を更新する
        this.transform.position = currentLookAtPos + craneVec * armLength;

        // プレイヤーの座標にカメラを向ける
        this.transform.LookAt(currentLookAtPos);
    }

    // 角度を0~360°に収める関数
    Vector3 WrapAngle(Vector3 vector)
    {
        vector.x %= Mathf.PI * 2;
        vector.y %= Mathf.PI * 2;
        vector.z %= Mathf.PI * 2;

        return vector;
    }
}


プレイヤーのコード

カメラの中心座標を目標にキャラクターが追従していくコード。PlayerController2というクラスで作成。

using System.Collections;
using System.Collections.Generic;
using UnityEngine;

// ステート
public enum StateType
{
    Idle,
    Follow,
}

public class PlayerController2 : MonoBehaviour
{
    public float rotationSpeed = 360.0f;
    public float moveSpeed = 1.0f;

    GameObject camera;	// 外部のオブジェクトを参照する
    Animator animator;

    Vector3 pos = new Vector3();
    Vector3 currentPos = new Vector3();

    // アニメーションのブレンドに使う変数
    float speed;

    // 追従フラグ
    bool isFollow;

    private StateType state;

    // Start is called before the first frame update
    void Start()
    {
        camera = GameObject.FindGameObjectWithTag("MainCamera");
        animator = this.GetComponentInChildren<Animator>();
    }

    // Update is called once per frame
    void Update()
    {
        // 他のオブジェクトのスクリプトを読み込む(スクリプトはクラス扱い)
        CameraController2 cameraScript = camera.GetComponent<CameraController2>();

        // Slerpは球面線形補間、Vector3.Angleは二点間の角度(degree)を返す
        Vector3 forward = Vector3.Slerp(this.transform.forward, (cameraScript.target - pos), rotationSpeed * Time.deltaTime / Vector3.Angle(this.transform.forward, (cameraScript.target - pos)));

        // 目標との距離
        float distance = (pos - cameraScript.target).magnitude;

        // ステートマシン
        switch(state)
        {
            // 待機
            case StateType.Idle:
                // 距離が離れていたら追いかけるフラグを立てる
                if (distance > 2.0f)
                {
                    state = StateType.Follow;
                }
                else
                {
                    speed -= 2.0f * Time.deltaTime;
                    if (speed <= 0) speed = 0;
                }
                break;

            // 追跡
            case StateType.Follow:

                // ベクトル方向へ向かせる
                transform.LookAt(pos + forward);

                // 減速
                if (distance < 1.5f)
                {
                    speed -= 1.0f * Time.deltaTime;
                    if (speed <= 0) speed = 0;
                }
                // 加速
                else
                {
                    speed += 0.5f * Time.deltaTime;
                    if (speed > 1.0f) speed = 1.0f;
                }

                pos += this.transform.forward * speed * moveSpeed * Time.deltaTime;
                this.transform.position = pos;

                // 立ち止まるフラグ
                if (distance < 0.5f)
                    state = StateType.Idle;

                break;
        }

        // アニメーターコントローラへ値を渡す(最大が1になるベクトルの長さ)
        animator.SetFloat("Blend", speed);
    }
}

Unity: キャラクターとカメラ

環境:Unity 2019.2.13f1

キャラクターをアニメーションさせながら移動させ、カメラも追従するようにします。キャラクターの移動方向はカメラ視点が変わっても入力方向と一致するようにします。


準備

ボーンの入ったプレイヤーモデルとアニメーションのFBXを用意。今回は待機、歩き、走りモーションの3つをブレンドして使うことにしました。


プレイヤーの構造

Create EmptyでPlayerというオブジェクトをつくり、そこにプレイヤーモデルをぶらさげる。Playerにプレイヤーを動かすスクリプトをアタッチし、モデルにアニメーターコントロールをアタッチする構造になる。

TagにPlayerを設定しておく。後々スクリプトで参照する。


アセット内にAnimator Controllerをつくる。続いてCreate State > From New Blend Treeでブレンドツリーをつくる。

ブレンドツリーを開き、アニメーションを追加していく。事前にモーションアセット内でアニメーションの名前を変更しておくとわかりやすくなる。ここではidleAnim、walkAnim、runAnimという名前にした。切り替えるアニメーションのタイミングを数値で設定する。歩くアニメーションを早めのタイミングで切り替えたかったので0.15に設定。

アニメーションが原点から移動する場合はLoop Timeにチェックし、Loop Poseにもチェックを入れる。Applyを押して変更を決定することを忘れずに。

続いてスクリプト。カメラもプレイヤーも互いのスクリプトを参照し合う仕組みです。


カメラのスクリプト

ゲームパッドの右スティックでカメラをプレイヤーのまわりを回転するようにする。


ゲームパッドの右スティックを有効にする

メニューのEdit > Project Settings > Input
Sizeを2足して20にする。Horizontal2とVertical2という項目名にして画像のように数字を設定する。

コードは以下。CameraControllerという名前で作成。プレイヤーの座標を参考にしてオフセットする。

using System.Collections;
using System.Collections.Generic;
using UnityEngine;

public class CameraController : MonoBehaviour
{
    // 外部オブジェクトの参照
    GameObject player;

    public Vector3 cameraRotation = new Vector3();
    Vector3 currentCamRotation = new Vector3();

    public float dist = 4.0f;
    Vector3 currentLookAtPos = new Vector3();

    // Start is called before the first frame update
    void Start()
    {
        player = GameObject.FindGameObjectWithTag("Player");
    }

    // Update is called once per frame
    void Update()
    {
        // ゲームパッド右スティックからの値を加算する
        cameraRotation += new Vector3(-Input.GetAxis("Vertical2"), -Input.GetAxis("Horizontal2"), 0) * 2.0f * Time.deltaTime;

        // X軸回転の制限
        cameraRotation.x = Mathf.Clamp(cameraRotation.x, 15 * Mathf.Deg2Rad, 60 * Mathf.Deg2Rad);

        // 遅延用の角度との差分をとる
        Vector3 diff = cameraRotation - currentCamRotation;
        currentCamRotation += WrapAngle(diff) * 0.2f;

        // 角度からベクトルを計算する
        Vector3 craneVec = new Vector3
        (
            Mathf.Cos(currentCamRotation.x) * Mathf.Cos(currentCamRotation.y),
            Mathf.Sin(currentCamRotation.x),
            Mathf.Cos(currentCamRotation.x) * Mathf.Sin(currentCamRotation.y)
        );

        // 注視点の座標
        Vector3 lookAtPos = player.transform.position + new Vector3(0, 1, 0);

        currentLookAtPos += (lookAtPos - currentLookAtPos) * 0.2f;

        // カメラの座標を更新する
        this.transform.position = currentLookAtPos + craneVec * dist;

        // プレイヤーの座標にカメラを向ける(これは最後にする)
        this.transform.LookAt(currentLookAtPos);
    }

    // 角度を0~360°に収める関数
    Vector3 WrapAngle(Vector3 vector)
    {
        vector.x %= Mathf.PI * 2;
        vector.y %= Mathf.PI * 2;
        vector.z %= Mathf.PI * 2;

        return vector;
    }
}


プレイヤーのスクリプト

PlayerControllerという名前で作成。カメラの回転値を参照して進む方向を計算する。またAnimator Controllerに速度の値を渡す。

using System.Collections;
using System.Collections.Generic;
using UnityEngine;

public class PlayerController : MonoBehaviour
{
    public float moveSpeed = 2.0f;
    public float rotationSpeed = 360.0f;

    GameObject camera;	// 外部のオブジェクトを参照する

    Animator animator;

    // Start is called before the first frame update
    void Start()
    {
        camera = GameObject.FindGameObjectWithTag("MainCamera");
        animator = this.GetComponentInChildren<Animator>();
    }

    // Update is called once per frame
    void Update()
    {
        // ゲームパッドの左スティックのベクトルを取得する
        Vector3 direction = new Vector3(Input.GetAxis("Horizontal"), 0, Input.GetAxis("Vertical"));
        
        // 他のオブジェクトのスクリプトを読み込む(スクリプトはクラス扱い)
        CameraController cameraScript = camera.GetComponent<CameraController>();

        // カメラのY軸角度から回転行列を生成する
        Quaternion rot = Quaternion.Euler(0, cameraScript.cameraRotation.y * Mathf.Rad2Deg + 90, 0);

        // 逆行列を生成する
        Matrix4x4 m = Matrix4x4.TRS(Vector3.zero, rot, Vector3.one);
        Matrix4x4 inv = m.inverse;

        // 回転行列をかけたベクトルに変換する
        direction = inv.MultiplyVector(direction);

        if (direction.magnitude > 0.001f)
        {
            // Slerpは球面線形補間、Vector3.Angleは二点間の角度(degree)を返す
            Vector3 forward = Vector3.Slerp(this.transform.forward, direction, rotationSpeed * Time.deltaTime / Vector3.Angle(this.transform.forward, direction));

            // ベクトル方向へ向かせる
            transform.LookAt(this.transform.position + forward);
        }

        // 座標移動させる
        transform.position += direction * moveSpeed * Time.deltaTime;

        // アニメーターコントローラへ値を渡す
        animator.SetFloat("Blend", direction.magnitude);
    }
}


Unity: Rendering Settings

手っ取り早くアンリアルエンジン標準の描画のような設定にする方法。
Unityのバージョンは2018.3.0


ライティング

InspectorのStaticにチェックを入れるとライトマップがベイクされる。


ポストエフェクト

Window > Package Manager
リスト内のPost Processingをインストールする

アセットフォルダ内で右クリックし、Create>Post Processing Profileを作成する

シーン内で右クリックし、Create Emptyでからのオブジェクトを作る
Inspecter内のLayerをPostProcessingに変更する
Add ComponentでPost Process Volumeを追加し、isGlobalをチェックし
作成したPost Processing Profileを割り当てる

Post Processing Profileで以下の項目を追加する
Ambient Occlusion:0.1あたりがちょうどいい
Chromatic Aberration:0.1あたりがちょうどよい
Bloom:Intensityを1あたりに

Screen Space Reflectionを有効にするためには
Edit>Project Settings
Graphicsの項目にてHighのRendering PathをDeferredに設定する